> ## Documentation Index
> Fetch the complete documentation index at: https://comfyuiwiki.com/llms.txt
> Use this file to discover all available pages before exploring further.

# Comfy API と Router のサンプル

> Comfy Router のモデルとデプロイ済みの ComfyUI ワークフローを始めるための出発点に加え、デプロイして改変できる完全なデモアプリを紹介します。

実行したい内容に合ったパスを選んでください。

## モデルAPI

Comfy Routerを使えば、1つのComfy APIキーでホストされたパートナーモデルを呼び出せます。

<CardGroup cols={2}>
  <Card title="画像を生成する" icon="image" href="/ja/development/comfy-router/quickstart">
    Python、TypeScript、またはcURLでFluxを使って最初の画像を生成します。
  </Card>

  <Card title="利用可能なモデルをブラウズする" icon="magnifying-glass" href="/ja/development/comfy-router/models">
    モデルを検索し、その入力を確認して、モデルIDをコピーします。
  </Card>

  <Card title="モデルのスキーマを使用する" icon="list-tree" href="/ja/development/comfy-router/models/black-forest-labs/flux-2-pro/code">
    Routerモデルのリクエストとレスポンスの形状を確認します。
  </Card>

  <Card title="HTTP経由でRouterを呼び出す" icon="terminal" href="/ja/development/comfy-router/reference">
    共有のRouterエンドポイントとヘッダーを確認します。
  </Card>
</CardGroup>

## Comfy API

独自の ComfyUI ワークフローをパッケージ化して、マネージド GPU インフラストラクチャにデプロイし、Comfy API を通じて実行できます。

<CardGroup cols={2}>
  <Card title="ワークフローをデプロイ" icon="cloud-arrow-up" href="/ja/development/serverless/overview#クイックスタート">
    Build を作成してリリースし、マネージドデプロイを開始します。
  </Card>

  <Card title="コンピュートを選択" icon="microchip" href="/ja/development/serverless/overview#リージョンと-gpu-の可用性">
    デプロイする前に、利用可能なリージョンと GPU クラスを確認します。
  </Card>

  <Card title="デプロイ済みワークフローを実行" icon="play" href="/ja/development/serverless/overview#4-ワークフローを実行する">
    API 形式のワークフローを送信し、その出力をダウンロードします。
  </Card>

  <Card title="SDK を使用する" icon="code" href="/ja/development/api-development/sdks#serverless-deployment">
    Python または TypeScript SDK を自分のデプロイ先に指定します。
  </Card>
</CardGroup>

## フルデモ

完全なデモアプリから始めて、ワークフローとインターフェースを自分のプロジェクト向けに調整しましょう。最速の方法を求めるなら Comfy Cloud を、独自のモデルやノードが必要な場合は「自分でデプロイ」を選んでください。

<div className="sample-card-grid">
  <div className="sample-card" data-sample-card="true">
    <div className="sample-card-inner">
      <div className="sample-card-face sample-card-front" data-sample-front="true">
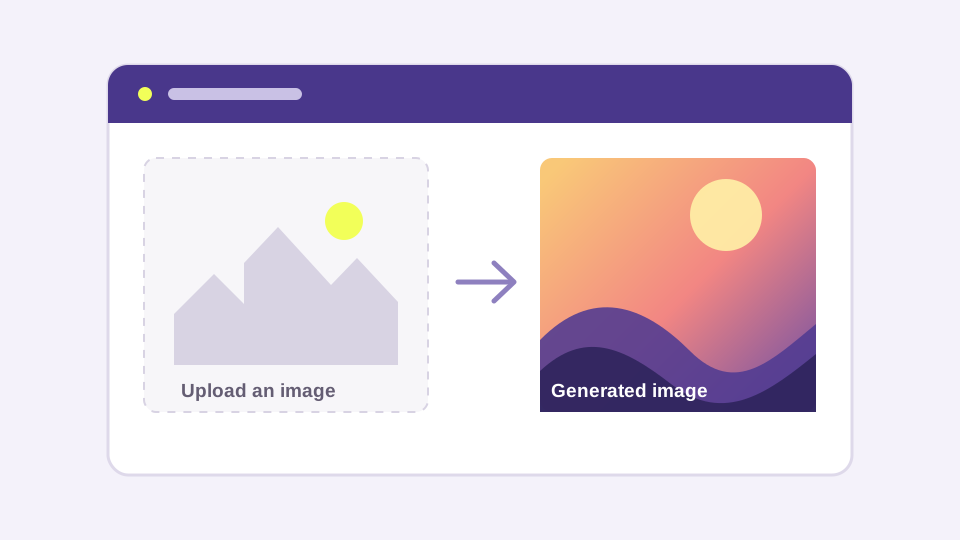
        <img src="https://mintcdn.com/comfyuiwikicom/BkE53cHdW1j4wHJS/images/samples/img2img-web-app.svg?fit=max&auto=format&n=BkE53cHdW1j4wHJS&q=85&s=39e11c3011b2ef857e5a661a007d8849" alt="画像から画像へのウェブアプリのプレビュー" className="sample-card-preview" data-sample-preview="api" noZoom="true" width="960" height="540" data-path="images/samples/img2img-web-app.svg" />

        <div className="sample-card-body">
          <h2>画像から画像へのウェブアプリ</h2>
          <p>画像をアップロードして Comfy ワークフローを実行し、結果を Next.js アプリで表示します。</p>

          <div className="sample-card-actions">
            <button type="button" data-sample-open="api">Comfy Cloud を使う</button>
            <button type="button" data-sample-open="endpoint">自分でデプロイ</button>
          </div>

          <div className="sample-card-links">
            <a href="https://github.com/Comfy-Org/comfy-examples/blob/main/img2img-web-app/workflows/workflow_api.json?raw=1">ワークフローをダウンロード ↗</a><span>·</span><a href="https://github.com/Comfy-Org/comfy-examples/tree/main/img2img-web-app">ソースを表示 ↗</a>
          </div>
        </div>
      </div>

      <div className="sample-card-face sample-card-back" data-sample-path="api" aria-hidden="true" inert="true">
        <div className="sample-path-body">
          <button type="button" data-sample-back="true">← デモアプリに戻る</button>
          <p className="sample-path-eyebrow">Comfy Cloud</p><h2>Comfy Cloud で画像から画像へのウェブアプリを使う</h2>
          <p>Comfy Cloud をマネージドエンドポイントとして使用します。APIキーを作成し、アプリのコピーをデプロイします。</p>

          <div className="sample-path-steps">
            <div className="sample-path-step"><span className="sample-path-number">1</span><div className="sample-path-copy"><strong>APIキーを作成</strong><span>Comfy APIキーを作成して保存します。対象となる Comfy Cloud サブスクリプションも必須です。</span></div><a href="https://platform.comfy.org/profile/api-keys">APIキーを作成 ↗</a></div>
            <div className="sample-path-step"><span className="sample-path-number">2</span><div className="sample-path-copy"><strong>アプリを Vercel にデプロイ</strong><span>プロバイダーがこのサンプルのコピーをあなたのアカウント内に作成します。</span></div><a href="https://vercel.com/new/clone?repository-url=https%3A%2F%2Fgithub.com%2FComfy-Org%2Fcomfy-examples%2Ftree%2Fmain%2Fimg2img-web-app&env=COMFY_BASE_URL%2CCOMFY_API_KEY&envDefaults=%7B%22COMFY_BASE_URL%22%3A%22https%3A%2F%2Fcloud.comfy.org%22%7D">アプリをデプロイ ↗</a></div>
          </div>
        </div>
      </div>

      <div className="sample-card-face sample-card-back" data-sample-path="endpoint" aria-hidden="true" inert="true">
        <div className="sample-path-body">
          <button type="button" data-sample-back="true">← デモアプリに戻る</button>
          <p className="sample-path-eyebrow">自分でデプロイ</p><h2>画像から画像へのウェブアプリ用に独自のエンドポイントをデプロイ</h2>
          <p>独自のモデルやカスタムノードが必要な場合は、Comfy API のサーバーレスエンドポイントを作成します。</p>

          <div className="sample-path-steps">
            <div className="sample-path-step"><span className="sample-path-number">1</span><div className="sample-path-copy"><strong>ワークフローをダウンロード</strong><span>専用のデプロイフローでこのAPI形式のワークフローを使用します。</span></div><a href="https://github.com/Comfy-Org/comfy-examples/blob/main/img2img-web-app/workflows/workflow_api.json?raw=1">ワークフローをダウンロード ↗</a></div>
            <div className="sample-path-step"><span className="sample-path-number">2</span><div className="sample-path-copy"><strong>APIキーを作成</strong><span>デプロイしたアプリが使用するキーを作成して保存します。</span></div><a href="https://platform.comfy.org/profile/api-keys">APIキーを作成 ↗</a></div>
            <div className="sample-path-step"><span className="sample-path-number">3</span><div className="sample-path-copy"><strong>ワークフローを貼り付けてデプロイ</strong><span>Builds でワークフローを貼り付け、エンドポイントを設定し、そのURLが発行されるのを待ちます。</span></div><a href="https://platform.comfy.org/profile/builds">ビルドを開く ↗</a></div>
            <div className="sample-path-step"><span className="sample-path-number">4</span><div className="sample-path-copy"><strong>エンドポイントのURLとAPIキーを貼り付け</strong><span>アプリのデプロイ時に COMFY\_BASE\_URL と COMFY\_API\_KEY を設定します。</span></div><a href="https://vercel.com/new/clone?repository-url=https%3A%2F%2Fgithub.com%2FComfy-Org%2Fcomfy-examples%2Ftree%2Fmain%2Fimg2img-web-app&env=COMFY_BASE_URL%2CCOMFY_API_KEY">アプリをデプロイ ↗</a></div>
          </div>
        </div>
      </div>
    </div>
  </div>

  <div className="sample-card" data-sample-card="true">
    <div className="sample-card-inner">
      <div className="sample-card-face sample-card-front" data-sample-front="true">
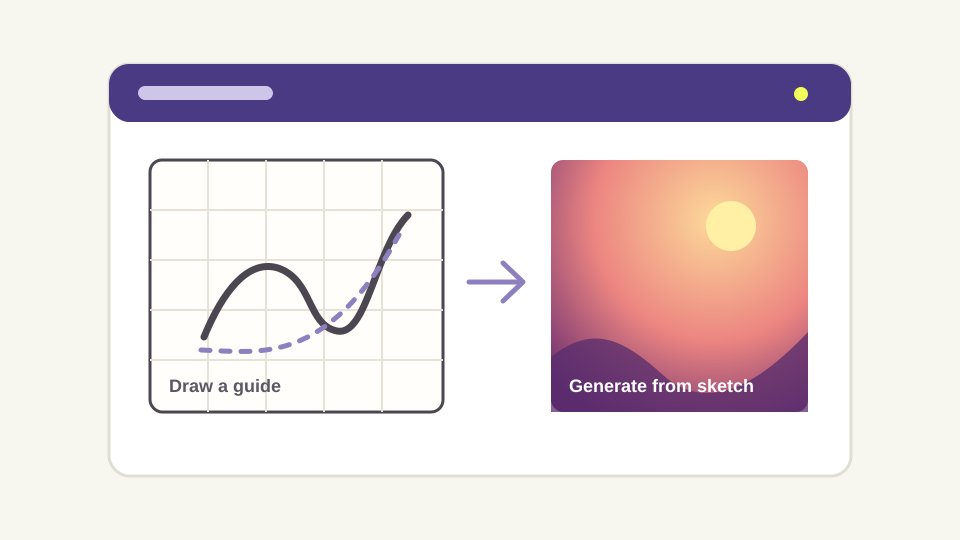
        <img src="https://mintcdn.com/comfyuiwikicom/BkE53cHdW1j4wHJS/images/samples/sketch-to-image.svg?fit=max&auto=format&n=BkE53cHdW1j4wHJS&q=85&s=af862b3d298ceb0fc311ae5cc3323270" alt="スケッチから画像へのアプリのプレビュー" className="sample-card-preview" data-sample-preview="api" noZoom="true" width="960" height="540" data-path="images/samples/sketch-to-image.svg" />

        <div className="sample-card-body">
          <h2>スケッチから画像へ</h2><p>ガイドを描くかインポートし、そのガイドとプロンプトから画像を生成します。</p>
          <div className="sample-card-actions"><button type="button" data-sample-open="api">Comfy Cloud を使う</button><button type="button" data-sample-open="endpoint">自分でデプロイ</button></div>
          <div className="sample-card-links"><a href="https://github.com/Comfy-Org/comfy-examples/blob/main/sketch-to-image/workflows/workflow_api.json?raw=1">ワークフローをダウンロード ↗</a><span>·</span><a href="https://github.com/Comfy-Org/comfy-examples/tree/main/sketch-to-image">ソースを表示 ↗</a></div>
        </div>
      </div>

      <div className="sample-card-face sample-card-back" data-sample-path="api" aria-hidden="true" inert="true">
        <div className="sample-path-body">
          <button type="button" data-sample-back="true">← デモアプリに戻る</button>
          <p className="sample-path-eyebrow">Comfy Cloud</p>
          <h2>Comfy Cloud で Sketch to image を使う</h2>
          <p>Comfy Cloud をマネージドエンドポイントとして使用します。APIキーを作成し、アプリのコピーをデプロイします。</p>

          <div className="sample-path-steps">
            <div className="sample-path-step"><span className="sample-path-number">1</span><div className="sample-path-copy"><strong>APIキーを作成</strong><span>Comfy APIキーを作成して保存します。対象となる Comfy Cloud サブスクリプションも必要です。</span></div><a href="https://platform.comfy.org/profile/api-keys">APIキーを作成 ↗</a></div>
            <div className="sample-path-step"><span className="sample-path-number">2</span><div className="sample-path-copy"><strong>Vercel にアプリをデプロイ</strong><span>プロバイダーがあなたのアカウントにこのサンプルのコピーを作成します。</span></div><a href="https://vercel.com/new/clone?repository-url=https%3A%2F%2Fgithub.com%2FComfy-Org%2Fcomfy-examples%2Ftree%2Fmain%2Fsketch-to-image&env=COMFY_BASE_URL%2CCOMFY_API_KEY&envDefaults=%7B%22COMFY_BASE_URL%22%3A%22https%3A%2F%2Fcloud.comfy.org%22%7D">アプリをデプロイ ↗</a></div>
          </div>
        </div>
      </div>

      <div className="sample-card-face sample-card-back" data-sample-path="endpoint" aria-hidden="true" inert="true">
        <div className="sample-path-body">
          <button type="button" data-sample-back="true">← デモアプリに戻る</button>
          <p className="sample-path-eyebrow">自分でデプロイ</p>
          <h2>Sketch to image 用の独自エンドポイントをデプロイ</h2>
          <p>独自のモデルやカスタムノードが必要な場合は、Comfy API サーバーレスエンドポイントを作成します。</p>

          <div className="sample-path-steps">
            <div className="sample-path-step"><span className="sample-path-number">1</span><div className="sample-path-copy"><strong>ワークフローをダウンロード</strong><span>専用のデプロイフローでこの API形式のワークフローを使用します。</span></div><a href="https://github.com/Comfy-Org/comfy-examples/blob/main/sketch-to-image/workflows/workflow_api.json?raw=1">ワークフローをダウンロード ↗</a></div>
            <div className="sample-path-step"><span className="sample-path-number">2</span><div className="sample-path-copy"><strong>APIキーを作成</strong><span>デプロイしたアプリが使用するキーを作成して保存します。</span></div><a href="https://platform.comfy.org/profile/api-keys">APIキーを作成 ↗</a></div>
            <div className="sample-path-step"><span className="sample-path-number">3</span><div className="sample-path-copy"><strong>ワークフローを貼り付けてデプロイ</strong><span>Builds でワークフローを貼り付け、エンドポイントを設定し、その URL を待ちます。</span></div><a href="https://platform.comfy.org/profile/builds">Builds を開く ↗</a></div>
            <div className="sample-path-step"><span className="sample-path-number">4</span><div className="sample-path-copy"><strong>エンドポイント URL と APIキーを貼り付け</strong><span>アプリのデプロイ時に COMFY\_BASE\_URL と COMFY\_API\_KEY を設定します。</span></div><a href="https://vercel.com/new/clone?repository-url=https%3A%2F%2Fgithub.com%2FComfy-Org%2Fcomfy-examples%2Ftree%2Fmain%2Fsketch-to-image&env=COMFY_BASE_URL%2CCOMFY_API_KEY">アプリをデプロイ ↗</a></div>
          </div>
        </div>
      </div>
    </div>
  </div>

  <div className="sample-card" data-sample-card="true">
    <div className="sample-card-inner">
      <div className="sample-card-face sample-card-front" data-sample-front="true">
        <img src="https://mintcdn.com/comfyuiwikicom/BkE53cHdW1j4wHJS/images/samples/discord-image-bot.svg?fit=max&auto=format&n=BkE53cHdW1j4wHJS&q=85&s=e2a7b16c61afc2ad639f4a8988b194d8" alt="Discord 画像ボットのプレビュー" className="sample-card-preview" data-sample-preview="api" noZoom="true" width="960" height="540" data-path="images/samples/discord-image-bot.svg" />

        <div className="sample-card-body">
          <h2>Discord 画像ボット</h2><p>Discord サーバーに `/imagine` コマンドを追加し、同梱の Comfy ワークフローを実行します。</p>
          <div className="sample-card-actions"><button type="button" data-sample-open="api">Comfy Cloud を使う</button><button type="button" data-sample-open="endpoint">自分でデプロイ</button></div>
          <div className="sample-card-links"><a href="https://github.com/Comfy-Org/comfy-discord-image-bot/blob/main/workflows/workflow_api.json?raw=1">ワークフローをダウンロード ↗</a><span>·</span><a href="https://github.com/Comfy-Org/comfy-discord-image-bot">ソースを表示 ↗</a></div>
        </div>
      </div>

      <div className="sample-card-face sample-card-back" data-sample-path="api" aria-hidden="true" inert="true">
        <div className="sample-path-body">
          <button type="button" data-sample-back="true">← デモアプリに戻る</button>
          <p className="sample-path-eyebrow">Comfy Cloud</p>
          <h2>Comfy Cloud で Discord 画像ボットを使う</h2>
          <p>Comfy Cloud をマネージドエンドポイントとして使用します。APIキーを作成し、アプリのコピーをデプロイします。</p>

          <div className="sample-path-steps">
            <div className="sample-path-step"><span className="sample-path-number">1</span><div className="sample-path-copy"><strong>APIキーを作成</strong><span>Comfy APIキーを作成して保存します。対象となる Comfy Cloud サブスクリプションも必要です。</span></div><a href="https://platform.comfy.org/profile/api-keys">APIキーを作成 ↗</a></div>
            <div className="sample-path-step"><span className="sample-path-number">2</span><div className="sample-path-copy"><strong>Render にアプリをデプロイ</strong><span>プロバイダーがあなたのアカウントにこのサンプルのコピーを作成します。</span></div><a href="https://render.com/deploy?repo=https%3A%2F%2Fgithub.com%2FComfy-Org%2Fcomfy-discord-image-bot">アプリをデプロイ ↗</a></div>
          </div>
        </div>
      </div>

      <div className="sample-card-face sample-card-back" data-sample-path="endpoint" aria-hidden="true" inert="true">
        <div className="sample-path-body">
          <button type="button" data-sample-back="true">← デモアプリに戻る</button>
          <p className="sample-path-eyebrow">自分でデプロイ</p>
          <h2>Discord 画像ボット用の独自エンドポイントをデプロイ</h2><p>独自のモデルやカスタムノードが必要な場合は、Comfy APIのサーバーレスエンドポイントを作成します。</p>

          <div className="sample-path-steps">
            <div className="sample-path-step"><span className="sample-path-number">1</span><div className="sample-path-copy"><strong>ワークフローをダウンロード</strong><span>このAPI形式のワークフローを専用のデプロイフローで使用します。</span></div><a href="https://github.com/Comfy-Org/comfy-discord-image-bot/blob/main/workflows/workflow_api.json?raw=1">ワークフローをダウンロード ↗</a></div>
            <div className="sample-path-step"><span className="sample-path-number">2</span><div className="sample-path-copy"><strong>APIキーを作成</strong><span>デプロイしたアプリで使用するキーを作成して保存します。</span></div><a href="https://platform.comfy.org/profile/api-keys">APIキーを作成 ↗</a></div>
            <div className="sample-path-step"><span className="sample-path-number">3</span><div className="sample-path-copy"><strong>ワークフローを貼り付けてデプロイ</strong><span>Buildsでワークフローを貼り付け、エンドポイントを設定し、URLが発行されるまで待ちます。</span></div><a href="https://platform.comfy.org/profile/builds">Buildsを開く ↗</a></div>
            <div className="sample-path-step"><span className="sample-path-number">4</span><div className="sample-path-copy"><strong>エンドポイントURLとAPIキーを貼り付け</strong><span>アプリのデプロイ時にCOMFY\_BASE\_URLとCOMFY\_API\_KEYを設定します。</span></div><a href="https://render.com/deploy?repo=https%3A%2F%2Fgithub.com%2FComfy-Org%2Fcomfy-discord-image-bot">アプリをデプロイ ↗</a></div>
          </div>
        </div>
      </div>
    </div>
  </div>
</div>

<Note>
  どちらのパスも[Comfy APIキー](https://platform.comfy.org/profile/api-keys)が必要です。「Deploy Your Own」では、ワークフローをダウンロードし、Buildsを使用して貼り付けてサーバーレスエンドポイントを設定し、URLが発行されるまで待ってから、そのURLとAPIキーをVercelまたはRenderのデプロイに貼り付けます。
</Note>

デモアプリを追加しますか？[サンプルリポジトリ](https://github.com/Comfy-Org/comfy-examples)をご覧ください。